LumiColor Equipment and Materials
- HVLP system with 1.3mm nozzle and PSI of 20 - 25
- Disposable cup system
- Filter - 120 mesh or 125 micron
- Glass or plastic stir sticks (DO NOT use wood or metal stir sticks)
- Substrate with properly masked, applied and dried dielectric
LumiColor Application Key Points
Solvent based material and the light emitting layer of the LumiLor system.
LumiColor is pre-mixed and ready to spray.
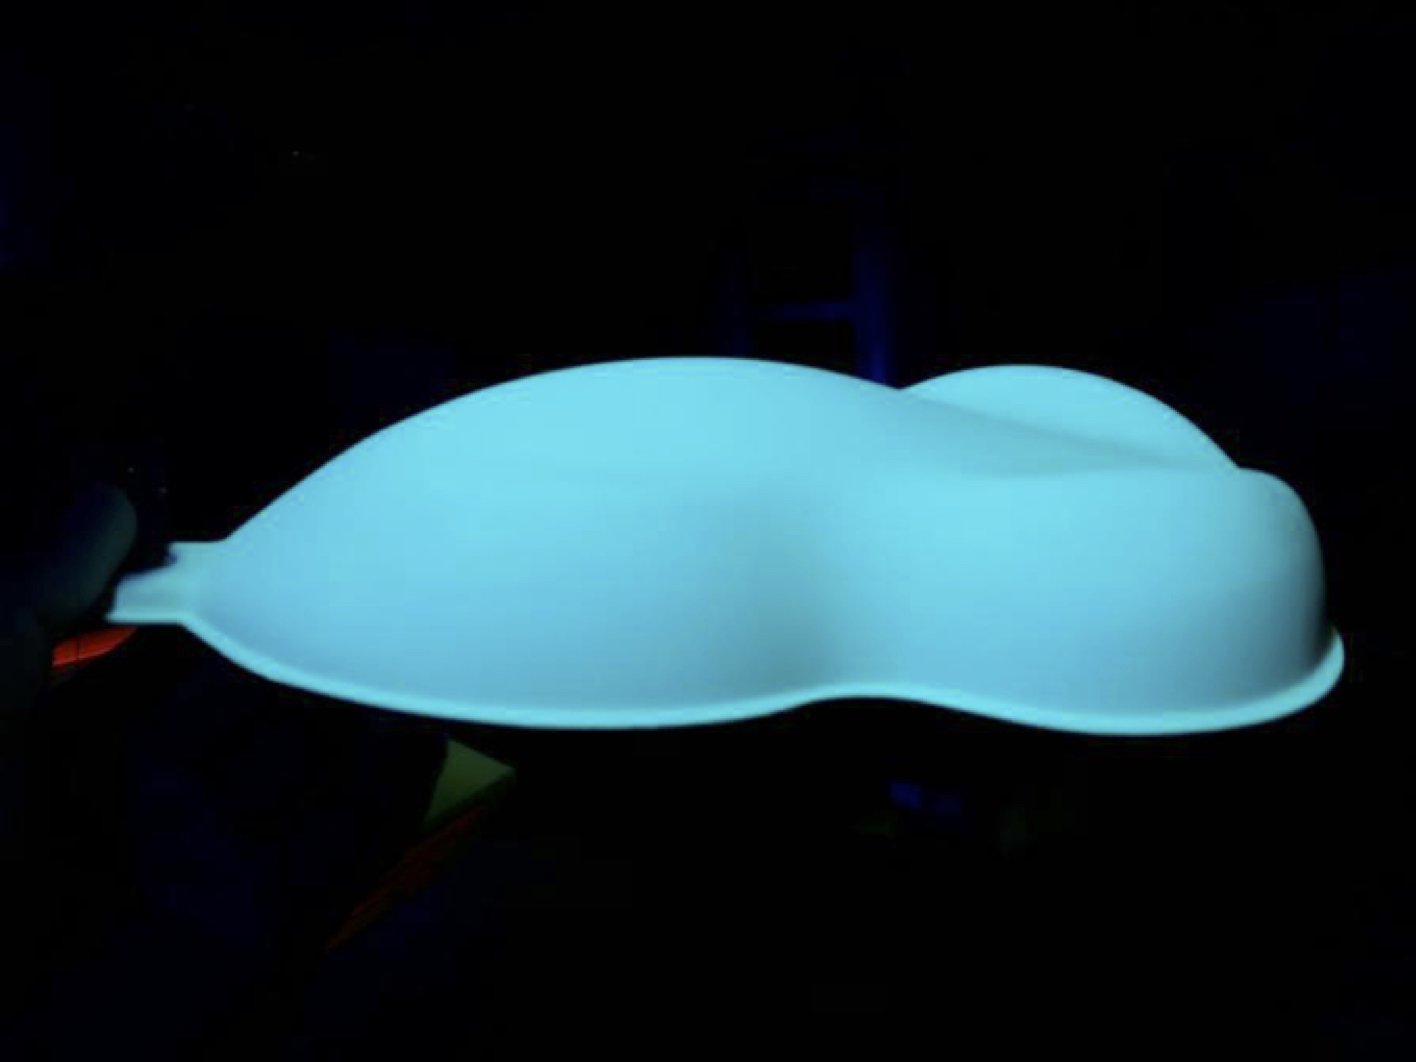
LumiColor will be applied under black lights with no other lights on. This allows you to see if the LumiColor is laying down in even and consistent coats. LumiColor is not visible in normal light during the application process.
LumiColor is applied over the entire dielectric layer and the entire backplane to ensure even and consistent light.
All coats will be sprayed with a cross coat and 50% to 75% overlapping process. Must be applied in an even and consistent manner.
LumiColor will crack or turn yellow and sag (sand dune effect) if applied too heavy and/or if dry times are artificially accelerated.
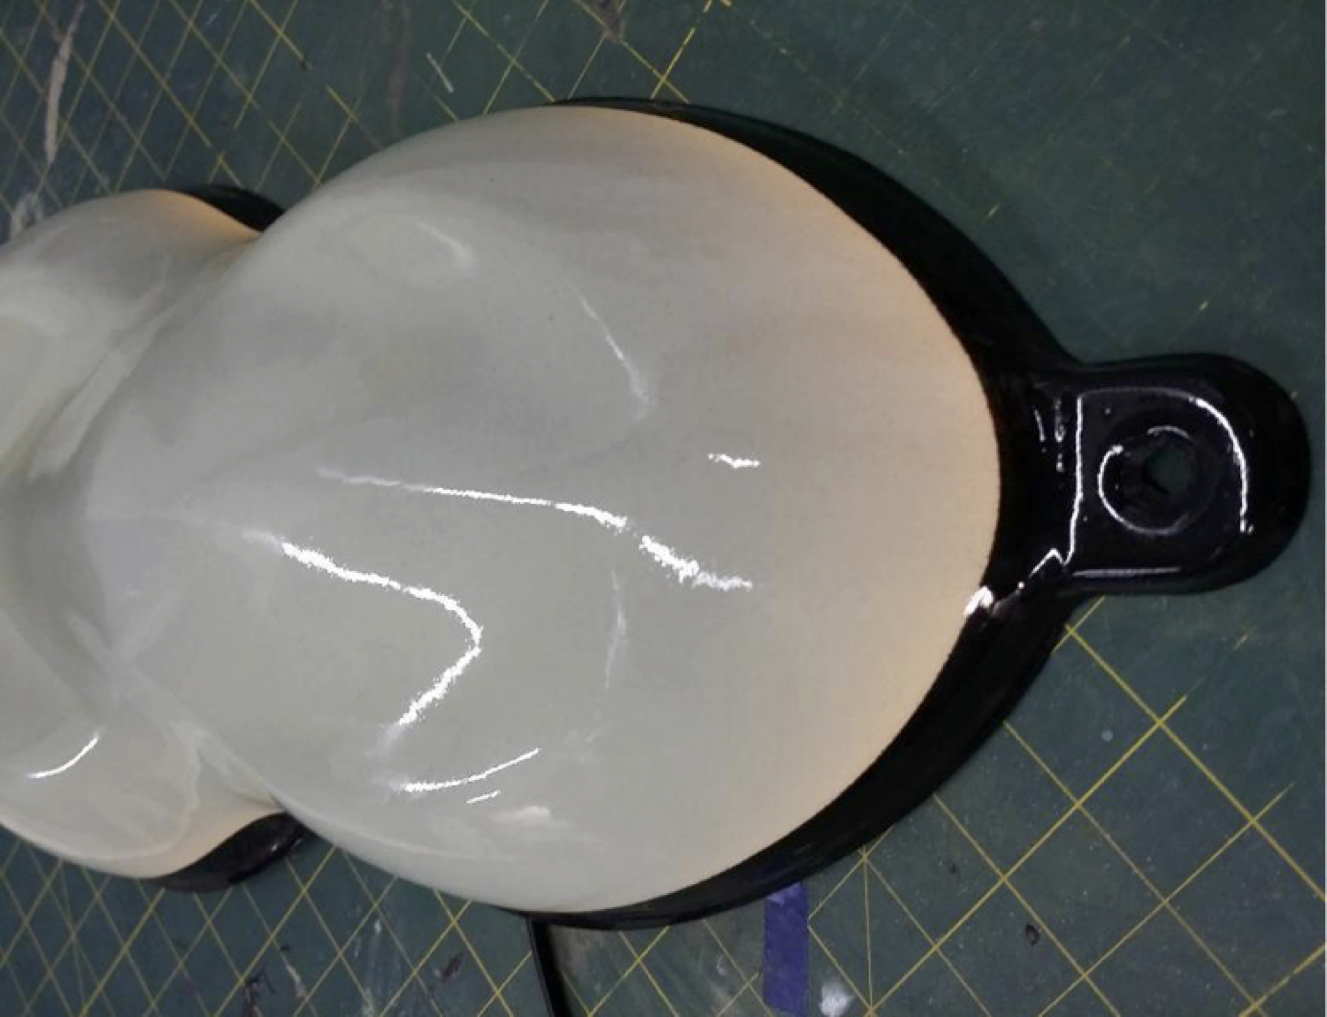
If the substrate, after the LumiColor dries, appears to have dark cloudy areas the LumiColor layer has been applied too heavy and when lit there will be dark cloudy areas.
LumiColor is to have a maximum of 3 consistent coats. Each coat should have a smooth finish after dry time.
If the surface of the LumiColor has a grainy appearance after dry time that coat was applied too light.
If the LumiColor shows any spotty areas or small craters also known as “sand dunning” then that coat was applied too heavy.
LumiColor thickness is approximately 1.5 mil or 38 microns.
LumiColor Application
Step 1 - Mix and Strain
- Thoroughly shake for 1 to 2 minutes
- Mix with glass or plastic stir sticks to insure no solids are at bottom of container \n
- DO NOT use wood or metal stir sticks
- Shake again as needed
- Strain with 120 mesh or 125 micron filter
Step 2 - Apply First Coat with Blacklight
- First coat of LumiColor will be spray in a cross coat pattern approximately 8" to 10"away.
- This coat should have no effect to the overall appearance of the surface under normal lighting.
- Allow 5 – 10 minutes flash time before applying next coat.
Step 3 - Apply Second Coat with Blacklight
- Apply second coat in the same process as the first coat.
- Under black light the LumiColor should have an even and bright color across the desired area.
- Allow 5 - 10 minutes flash time.
- The final appearance of the LumiColor before it goes to dry should have a semi-gloss appearance. It should be a smooth flat look when dry and should not have any pin holes, orange peel, or cracking on any part of the substrate.
Step 4 - Apply Third Coat with Blacklight (if needed)
- If the second coat of LumiColor does not produce an even glow under black light then a third coat will need to be applied.
- Apply third coat of in the same process as the first coat.
- Under black light the LumiColor should have an even and bright color across the desired area.
- Allow 5 - 10 minutes flash time.
- The final appearance of the LumiColor before it goes to dry should have a semi-gloss appearance. It should be a smooth flat look when dry and should not have any pin holes, orange peel, or cracking on any part of the substrate.
- If there are pin holes, orange peel texture, or cracking on any part of the substrate it may need to be sanded and re-applied. Contact your LumiLor dealer for direct support.
LumiColor Dry Time, Unused Material, and Clean-up
Wait a minimum of 45 to 60 minutes, and a maximum of 8 - 12 hours, at 70°F before moving on to masking of the busbar.
Return unused material to original container after agitated in the spray gun cup.
Clean any used containers and/or spray guns with thinners or acetone immediately after use.
Dry times will vary based on local environmental conditions.
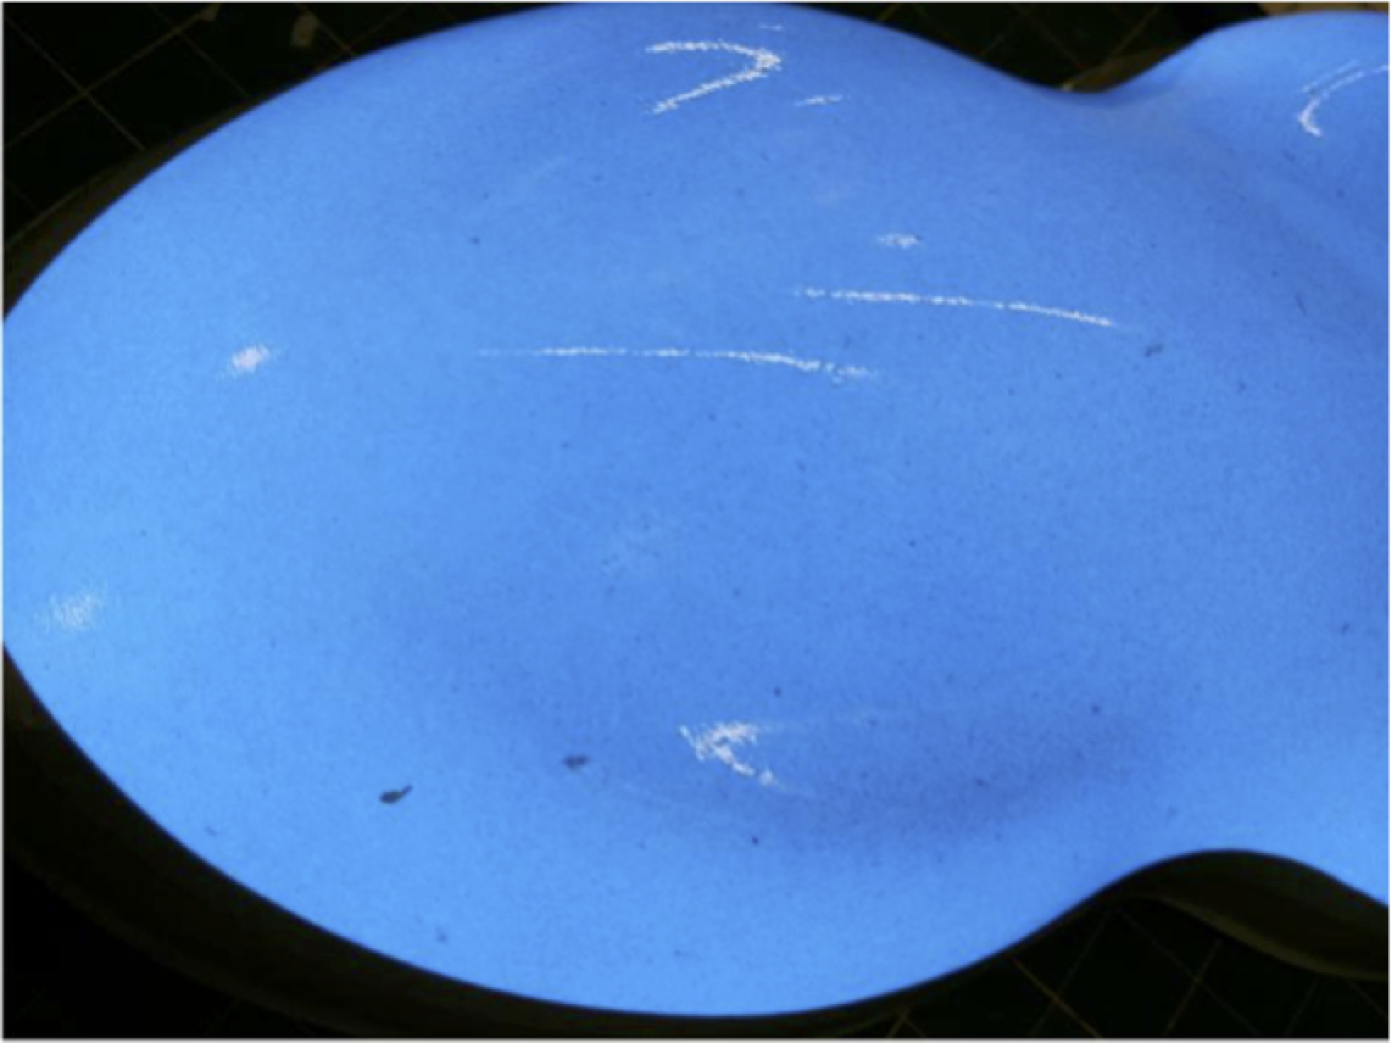
LumiColor Visual Reference Guide
Properly applied LumiColor produces an even finish
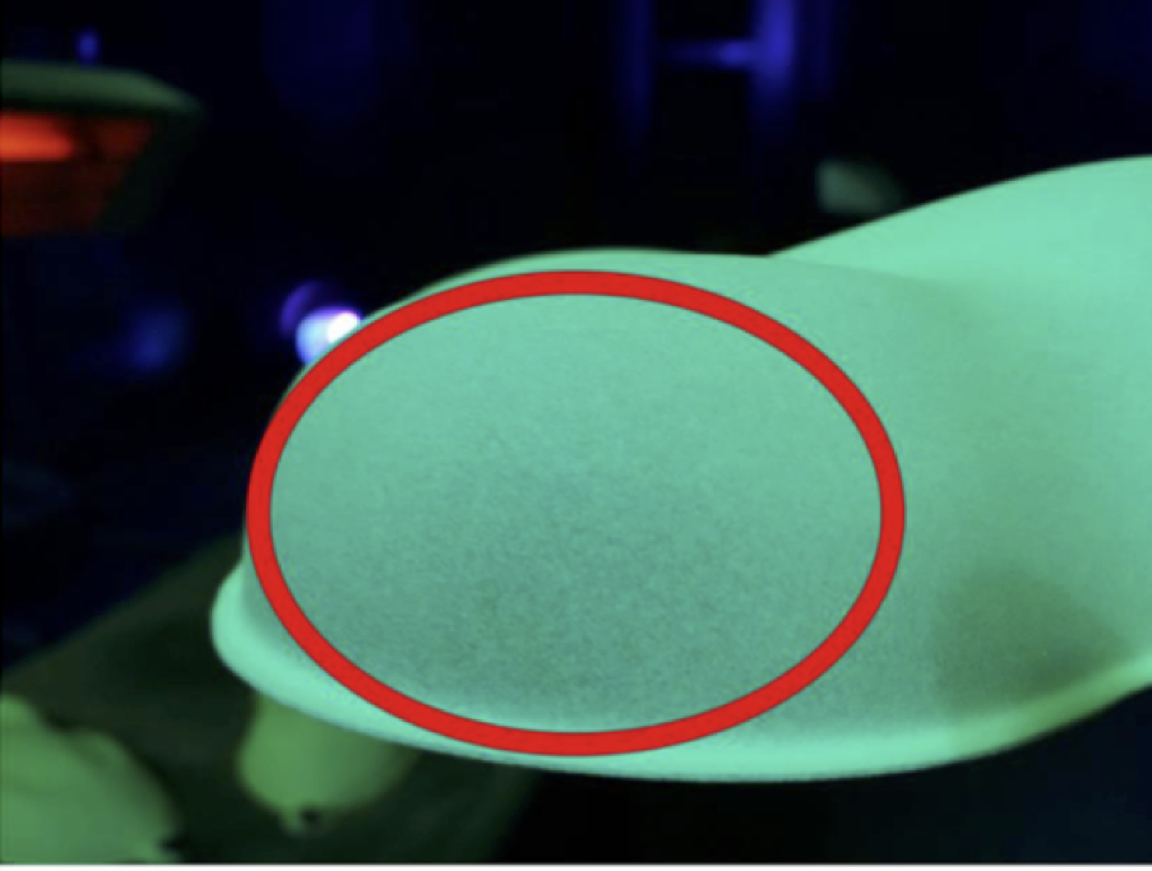
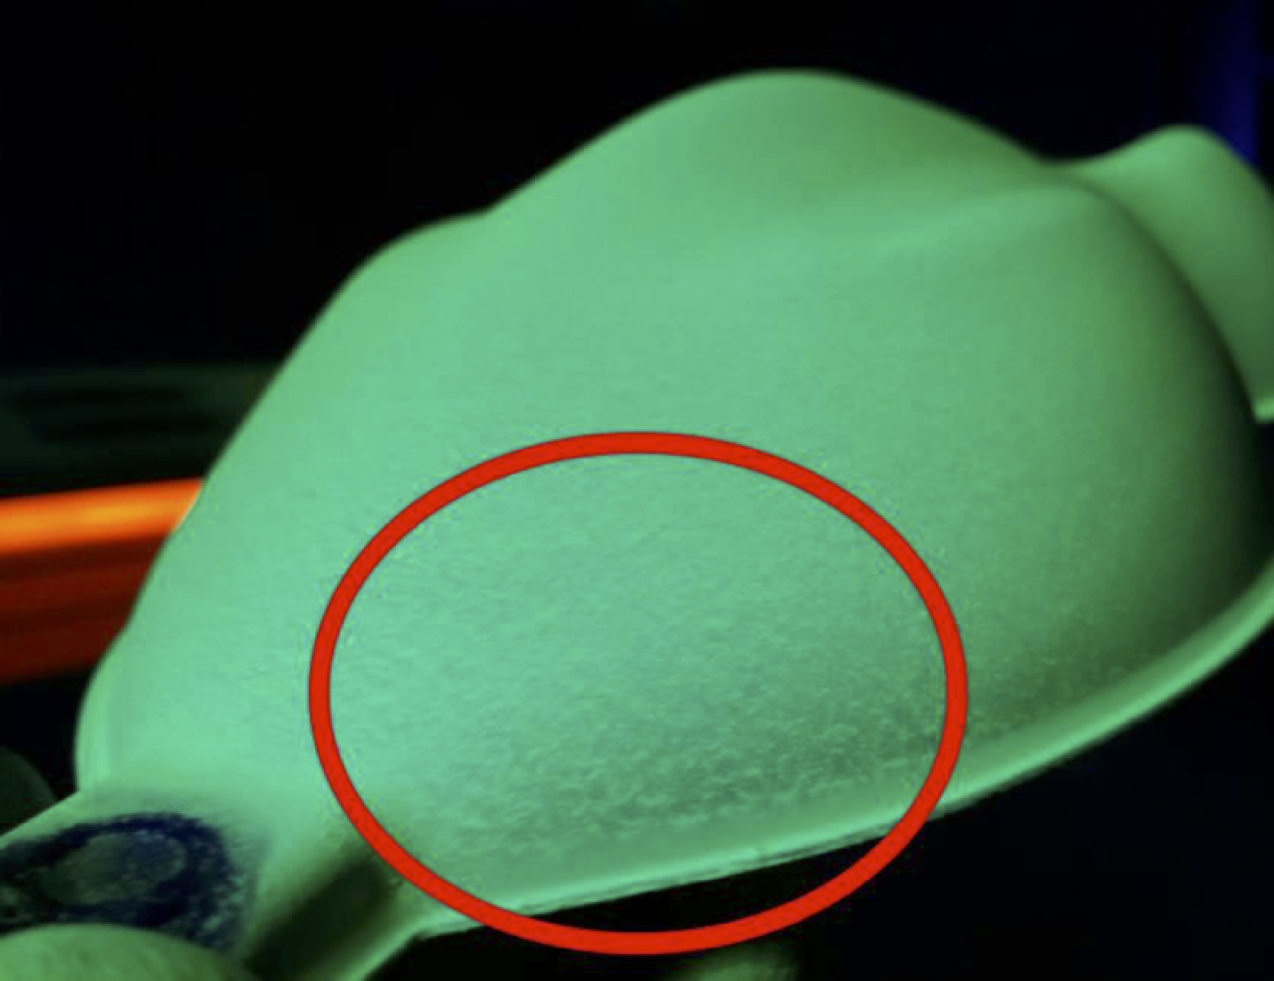
LumiColor - Blotchy and modeling when viewed under blacklight
- Power - N/A; viewed under black light
- Cause - LumiColor applied too thin
- To Correct This - Apply more LumiColor
-
To Avoid This - Apply correct amount of LumiColor
LumiColor - Sand dune effect
- Power - N/A
- Cause - LumiColor applied too wet; heavy particles sag while drying
- To Correct This - Lightly sand with 1000 or 1500 grit and reapply
-
To Avoid This - Lighter coats, proper distance, proper air pressure
LumiColor - Excessive spottiness with power on
- Cause - Debris falling on painted part, large particles in fluid
- To Correct This - Cover with top coat to hide particles
-
To Avoid This - Strain fluid better in all layers; spray in a clean environment; properly clean spray guns after each material
 LumiColor - Dark areas with power on
- Cause - Dielectric or LumiColor applied too heavy in dark areas
- To Correct This - Not fixable; need to remove LumiLor and restart.
-
To Avoid This - Follow applications instructions closely

LumiColor - Not fully illuminated with power on
- Cause - Insufficient LumiColor applied or too small of a busbar
- To Correct This -Not fixable; need to remove LumiLor and restart
-
To Avoid This - Follow applications instructions closely